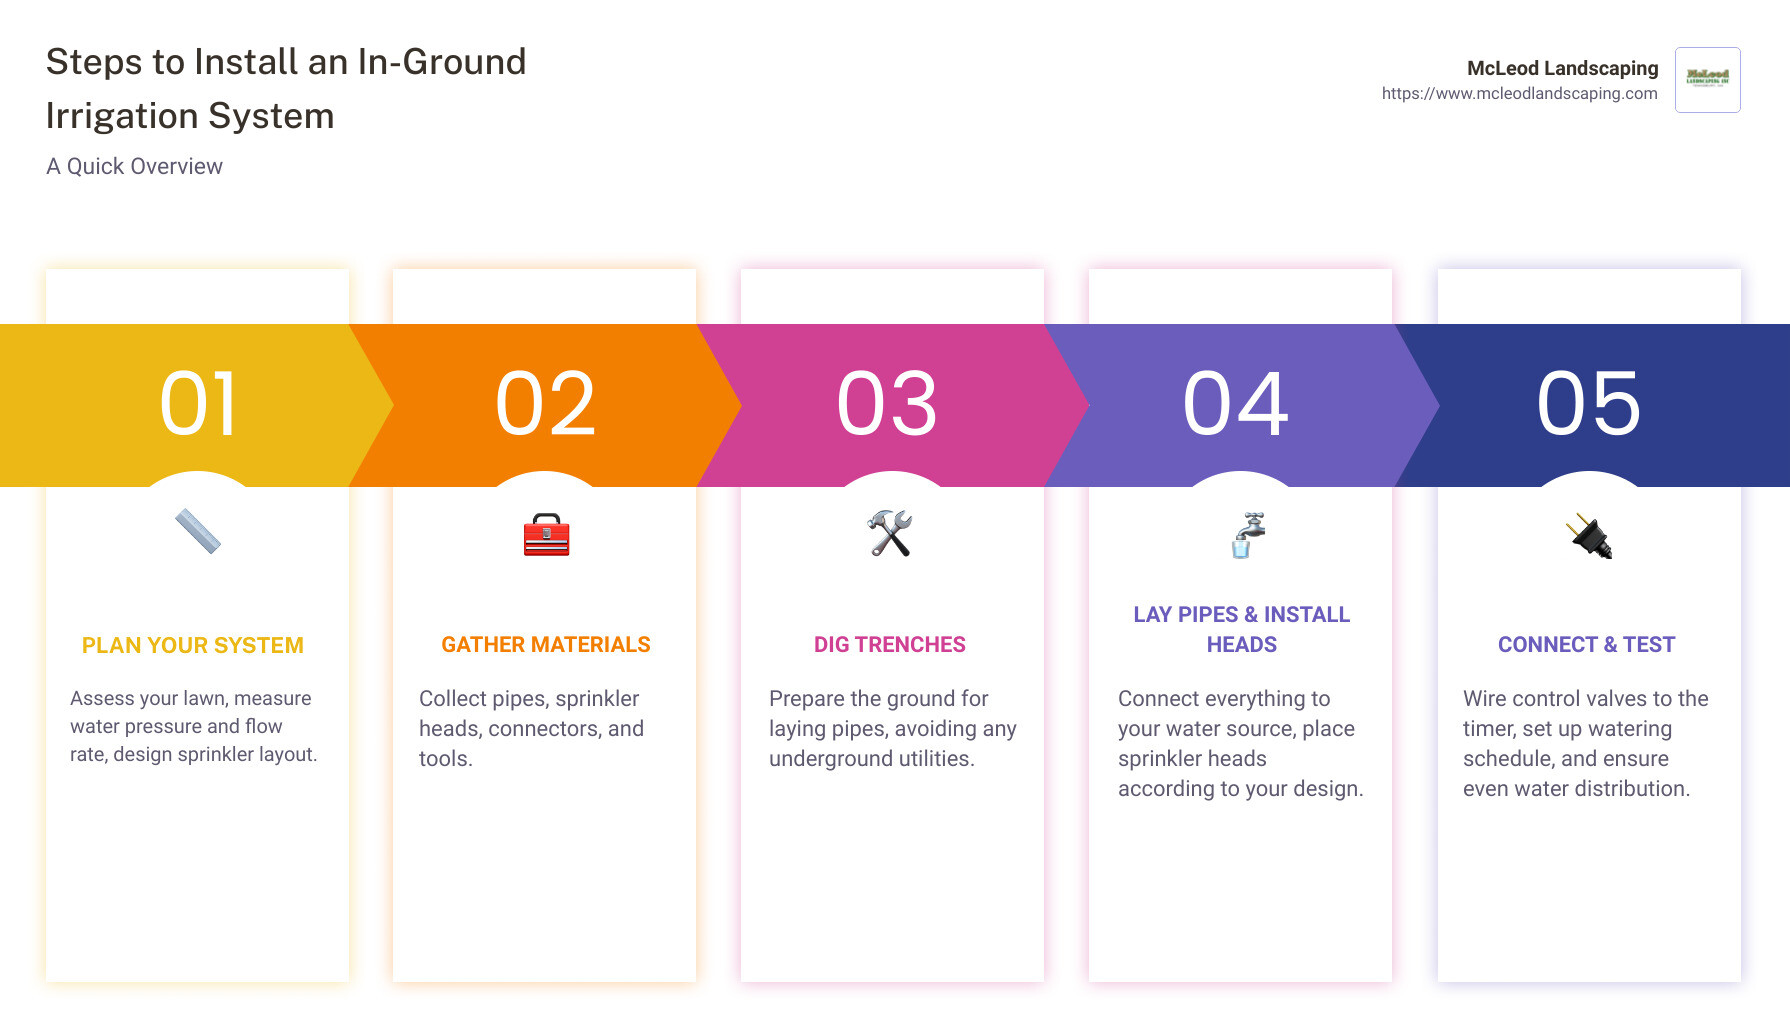
Installing an in-ground irrigation system can transform your lawn care routine, ensuring your landscape stays lush and vibrant without the hassle of manual watering. Here’s a quick overview of the steps you’ll take to install your system:
Understanding the basics of an in-ground irrigation system is crucial before starting the installation process. Proper irrigation is vital for maintaining healthy lawns and gardens, especially in areas with inconsistent rainfall. By installing an in-ground system, you automate watering tasks, save time, and potentially reduce water wastage through efficient distribution.
The importance of irrigation cannot be understated. A well-hydrated lawn not only enhances curb appeal but also promotes deep root growth, reduces soil erosion, and keeps your grass healthier overall. Without adequate irrigation, your lawn may struggle during dry spells, leading to patchy, unhealthy grass.
DIY benefits are substantial: you save on installation costs and gain the flexibility to tailor the system to your specific yard layout and watering needs. Many homeowners find great satisfaction in completing such a project, and with the right guidance, it’s entirely achievable.
I’m Scott McLeod, the owner of McLeod Landscaping. With over three decades of experience in landscaping and irrigation systems, I’ve helped countless clients achieve their dream yards with efficient and reliable watering solutions. Understanding how to install an in-ground irrigation system ensures your lawn stays green and beautiful all year round.
Before you start digging, it’s crucial to analyze your site. This includes understanding the types of plants, trees, and grass in your yard, as well as the soil type. Clay soil absorbs water slowly, while sandy soil absorbs it quickly but doesn’t hold it well. Knowing your soil type helps in designing an efficient irrigation system.
Next, evaluate your water source. Whether you’re using a municipal system or a well, you need to know your water pressure and flow rate. This will determine how many sprinkler heads you can run at once and how many zones you’ll need.
Water pressure is measured in pounds per square inch (PSI). You’ll need a pressure gauge to get an accurate reading. Attach the gauge to an outdoor faucet and turn off all other water sources in your home. This will give you the static water pressure. For a more accurate measure, you might also want to consult your local municipality, but remember, their readings are often averages for the neighborhood.
Flow rate is measured in gallons per minute (GPM). To determine this, use an outdoor spigot to fill a container of known volume (like a gallon jug) and time how long it takes to fill. Use this formula:
[ \text{Flow Rate (GPM)} = \frac{\text{Container Size (Gallons)}}{\text{Time (Seconds)}} \times 60 ]
Knowing your flow rate is essential for planning how many sprinkler heads you can run simultaneously.
Create a detailed map of your property. Use graph paper with a scale of 1 inch = 10 feet. Include all permanent features like your house, trees, flower beds, and sidewalks. Mark the location of your water meter and any slopes in your yard, as water pressure can vary with elevation changes.
Your yard will likely need multiple watering zones. Each zone is an independently controlled section of your irrigation system. Zones are determined by the physical attributes of your landscape and the capacity of your water supply. For example, a large lawn area might be one zone, while a flower bed could be another.
Different areas of your yard will need different types of sprinklers. Here are some common types:
Head-to-head coverage is essential to avoid dry spots. This means the spray from each sprinkler should reach the adjacent sprinkler.
Here’s a quick reference table for selecting sprinkler heads:
| Area Type | Recommended Sprinkler |
|---|---|
| Large Lawn | Rotary Sprinkler |
| Small Lawn | Pop-Up Sprinkler |
| Flower Beds | Drip Irrigation |
| Shrubs | Shrub Sprinkler |
By planning carefully, you set the foundation for a successful in-ground irrigation system. This ensures your lawn and garden receive the right amount of water efficiently, keeping them lush and healthy.
Next, we’ll dive into the essential tools and materials you’ll need for installation.
Before you start digging, you’ll need to gather some essential tools and materials. Here’s a breakdown of what you’ll need.
To lay your pipes, you’ll need to dig trenches. You can do this manually or with a machine.
Choosing the right type of pipe is crucial for a durable system.

You’ll need various connectors and fittings to route the water correctly.
Valve boxes protect your valves and make them easily accessible for maintenance.
Sprinkler heads vary based on water requirements and coverage area.
A backflow preventer is essential for preventing water contamination.
A programmable timer allows you to automate watering schedules.
The valve manifold is the heart of your irrigation system.

By gathering these essential tools and materials, you’ll be well-prepared to install your in-ground irrigation system. Next, we’ll walk you through the step-by-step installation process.
First, mark the locations of all the trenches and sprinklers with wooden stakes or plastic flags. This helps you visualize the layout.
Trench Depth: Dig trenches to a depth of 4 to 12 inches, depending on your local frost line and the type of pipe you’re using. For most areas, 6 inches is sufficient.
Avoiding Utilities: Important: Before you start digging, contact your local one-call center to mark any buried utilities like electrical cables, gas lines, or sewer lines. This step is crucial for safety.
Manual vs. Trencher: You can dig trenches manually using a garden spade, but renting a gas-powered trenching machine can save a lot of time and effort. Most rental dealers offer delivery and pickup services for a small fee.
PVC Cementing: Lay out the PVC pipes in the trenches according to your plan. Use PVC cement and primer to join pipe sections with couplings. Make sure to follow the manufacturer’s directions for a secure fit.
Connecting to Water Source: Turn off the water to your house at the meter. Cut into the main water line and splice in a tee fitting using PVC cement. If the line is copper, solder on a copper tee. Attach a 90-degree PVC elbow to a male PVC adapter and thread it into the tee fitting.
Running Main Lines: Run 1-inch schedule 40 PVC pipe from the main water line to the manifold. This will serve as the primary supply line.
Branching to Zones: Where a pipe branches off to a sprinkler head, splice in tee fittings and attach short lengths of flexible piping. This will connect to the sprinkler heads.
Types of Heads: Choose the right sprinkler head for each area. Gear-driven rotor heads are ideal for large areas, while fixed pop-up heads are better for small, targeted spaces. For flowerbeds, use drip-irrigation tubing.
Placement Strategy: Follow a head-to-head coverage strategy. This means the spray from each sprinkler head should reach the adjacent head to ensure complete coverage.
Head-to-Head Coverage: Overlapping the spray patterns prevents dry spots. Place the heads so that each one sprays to the next, ensuring even water distribution.
Valve Installation: Dig a trench from the main water line to the valve box location. Line the hole with gravel and set the valve box so the lid is flush with the grass. Glue together the manifold and attach the zone valves.
Wiring the Timer: Lay 24-volt underground wire in a shallow trench from the valve box to the timer location. Connect the wire to each zone valve according to the manufacturer’s instructions.
Programming Zones: Once the wiring is complete, program the timer to control different zones efficiently. This ensures each area gets the right amount of water.
System Flushing: Turn on the water to flush out any dirt or debris from the system. Then turn off the water and install the sprinklers.
Coverage Check: Turn the system back on and check for even coverage. Make sure all areas are getting adequate water without any dry spots.
Adjusting Heads: Adjust the spray patterns and distances of the sprinkler heads as needed. This will ensure that water is distributed evenly.
Leak Detection: Inspect the entire system for leaks. Tighten any loose fittings and replace any damaged components.
By following these steps, you’ll have a well-functioning in-ground irrigation system that keeps your lawn and garden lush and healthy. Next, we’ll discuss the importance of winterizing your system to protect it during colder months.
Winterizing your in-ground irrigation system is crucial to prevent damage from freezing temperatures. Here’s how to do it effectively:
Water left in the pipes can freeze, expand, and cause pipes to crack or burst. This can lead to expensive repairs and a delayed start to your spring gardening. Proper winterization ensures your system is ready to go when warmer weather returns.
First, turn off the water supply to your irrigation system. If your system has auto-drain valves, just open them to let the water drain out.
For systems with manual drains, you’ll need to open the valve manifolds to allow any remaining water to escape.
If your system doesn’t have auto-drain valves, you’ll need to use compressed air to blow out the remaining water.
Don’t forget the above-ground parts of your system. Wrap any exposed pipes, backflow preventers, and valves with insulation material. This adds an extra layer of protection against freezing temperatures.
By following these steps, you’ll safeguard your irrigation system against winter damage. This ensures a smooth start to your watering schedule when spring arrives. Next, let’s move on to some frequently asked questions about in-ground irrigation systems.
To determine the number of sprinklers per zone, you need to know your system’s water pressure and flow rate. Here’s a simple way to get started:
For example, if your system delivers 10 GPM and each sprinkler head needs 2 GPM, you can place up to 5 sprinklers in that zone.
The depth at which you bury your irrigation pipes is crucial for their longevity and efficiency. Here are the key points:
Efficiency and water conservation are critical for any irrigation system. Here are some tips to maximize both:
By following these guidelines, you’ll have a well-designed, efficient, and water-conserving irrigation system. For more detailed steps and expert advice, refer to our full guide on how to install an in-ground irrigation system.
Installing an in-ground irrigation system can seem daunting, but by breaking it down into manageable steps, it’s entirely doable. Let’s quickly review what we’ve covered:
By following these steps, you can set up an efficient irrigation system that keeps your lawn lush and green while conserving water.
Encouragement for DIYers
If you’re considering taking on this project yourself, many homeowners have successfully installed their own systems. For instance, one user shared how they installed a RainBird system with minimal experience and saw great results. Another user highlighted the importance of using swing pipes for easy adjustments and emphasized setting sprinkler heads before filling in the soil. These real-life examples show that with careful planning and a bit of elbow grease, you can achieve professional results.
McLeod Landscaping: Your Partner in Professional Landscaping and Irrigation Solutions
While DIY projects can be rewarding, sometimes you might prefer the expertise of professionals. At McLeod Landscaping, we specialize in irrigation system services. Whether you need help with installation, maintenance, or repair, our team is here to ensure your system runs smoothly and efficiently.
Ready to bring your lawn to the next level? Contact McLeod Landscaping today and let us help you achieve the lush, green lawn of your dreams.
Contact McLeod Landscaping today at (978) 640-0957 or click here to schedule a consultation for retaining wall installation. Let our experienced team design and install a functional and visually appealing retaining wall that enhances your landscape.

1881 Main St Unit 1, Tewksbury, MA 01876